📕 Linux 개발 환경 구축 (WSL2)
WSL2 환경 구축
- 기본 Flow 참고: 윈도우10 리액트 개발환경 구축 참고 링크
-
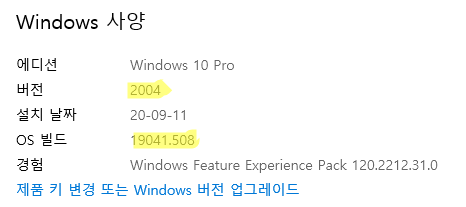
Window 버전 Update
- Ubuntu 설치(Microsoft Store: 최신 LTS - 20.04 사용을 권장함)
- WSL2 설치 및 버전 변환: https://www.lesstif.com/software-architect/wsl-2-windows-subsystem-for-linux-2-89555812.html

VSCode 개발 환경 세팅
- ‘Remote – WSL’ 확장 프로그램을 설치
- WSL: Ubuntu에 연결(Status bar 좌측 초록색 버튼)
- WSL: Ubuntu에 “Node Extension Pack” 확장 프로그램을 설치
-
HyperCloud 개발 환경 구축 (hypercloud console GitHub)
-
git clone
git clone https://github.com/tmax-cloud/console console(폴더 위치: /home/${user}/)
-
install curl
sudo apt-get install curl -
install nvm
curl -o- https://raw.githubusercontent.com/nvm-sh/nvm/v0.35.3/install.sh | bash(Latest Version: https://github.com/nvm-sh/nvm)
-
install node (12 +)
nvm install 14.15.0 -
install yarn (1.3.2 +)
npm install -g yarn -
install go (1.15 +)
(Latest Version)
sudo apt-get install golang-go
go버전 1.15.5 아래 링크 가이드를 통해 설치 (root에 설치 권장) 👉 https://www.tecmint.com/install-go-in-ubuntu/ -
install jq
sudo apt-get install jq✅ 7번 까지 설치하면 프로젝트 실행 가능 kubectl 설치는 필수 아님
-
install kubectl (https://kubernetes.io/ko/docs/tasks/tools/install-kubectl/#리눅스에-kubectl-설치)
curl -LO https://storage.googleapis.com/kubernetes-release/release/v1.19.0/bin/linux/amd64/kubectl // 최신 release download
sudo chmod +x ./kubectl // 실행 권한 부여
sudo mv ./kubectl /usr/local/bin/kubectl // 실행 PATH 설정된 directory로 이동
kubectl version --client // 버전 확인
-
실행
-
빌드 스크립트 실행
make build-dev -
새 터미널 열고 run-console 스크립트 실행
make run-console -
HyperCloud 페이지
https://{이름}.tmaxcloud.org/접속 (호스트명은 서버 담당자에게 문의)
발생할 수 있는 에러 유형 및 해결법
-
undefined: errors.Is (./build-backend.sh)

⇒ go version 1.15.*로 version upgrade 후, 해결
-
No such file or directory: ‘install’ (./build-frontend.sh)

-
RPC 서버를 사용할 수 없습니다.

⇒ RPC 서버 재시작 / 윈도우 포맷
-
HC 4.1 정상 빌드 후 실행 시 하얀 화면만 나오고 개발자 도구에 에러 발생

⇒
- 레지스트리 편집기 열기
Win + R > regedit HKEY_CLASSES_ROOT\.js경로로 들어가기- Content Type 이
text/javascript인지 확인 후 변경 & 재부팅
- Content Type 이
- 레지스트리 편집기 열기


WSL2 외부 네트워크로 연결
- PowerShell 관리자 모드로 열기
-
wsl 접속

-
접속한 wsl의 아무 위치나 상관 없이 wsl-networks.ps1 파일 생성 (찾기 쉬운 위치로 지정하는 것 추천)
포트 변경시
$ports=@(80,443,9000, 9001);이 줄에 추가$remoteport = bash.exe -c "ifconfig eth0 | grep 'inet '" $found = $remoteport -match '\d{1,3}\.\d{1,3}\.\d{1,3}\.\d{1,3}'; if( $found ){ $remoteport = $matches[0]; } else{ echo "The Script Exited, the ip address of WSL 2 cannot be found"; exit; } #[Ports] #All the ports you want to forward separated by coma $ports=@(80,443,9000, 9001); #[Static ip] #You can change the addr to your ip config to listen to a specific address $addr='0.0.0.0'; $ports_a = $ports -join ","; #Remove Firewall Exception Rules iex "Remove-NetFireWallRule -DisplayName 'WSL 2 Firewall Unlock' "; #adding Exception Rules for inbound and outbound Rules iex "New-NetFireWallRule -DisplayName 'WSL 2 Firewall Unlock' -Direction Outbound -LocalPort $ports_a -Action Allow -Protocol TCP"; iex "New-NetFireWallRule -DisplayName 'WSL 2 Firewall Unlock' -Direction Inbound -LocalPort $ports_a -Action Allow -Protocol TCP"; for( $i = 0; $i -lt $ports.length; $i++ ){ $port = $ports[$i]; iex "netsh interface portproxy delete v4tov4 listenport=$port listenaddress=$addr"; iex "netsh interface portproxy add v4tov4 listenport=$port listenaddress=$addr connectport=$port connectaddress=$remoteport"; } -
PowerShell.exe -ExecutionPolicy ByPass -File ./wsl-networks.ps1명령 실행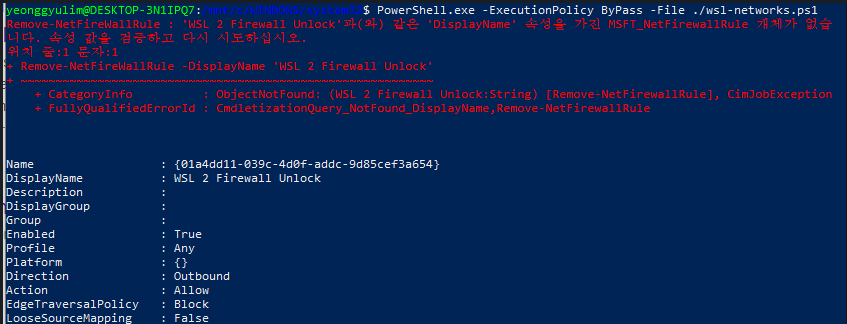
이 에러는 무시해도 괜찮음. 다음 실행부터는 안남…
-
PowerShell.exe가 없다는 에러 발생시

powershell.exe가 있는 폴더를 찾아 들어가서 직접 실행해주면 됨 (TODO: alias 설정)
/mnt/c/Windows/System32/WindowsPowerShell/v1.0/powershell.exe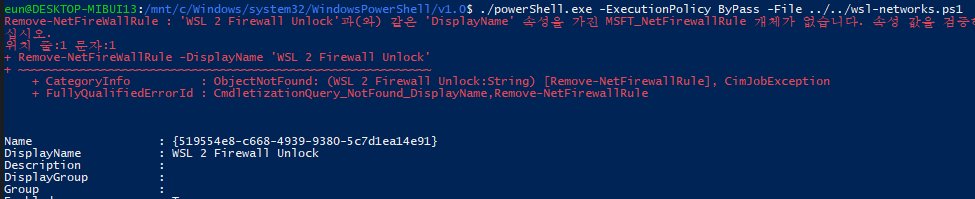
-
- 완료! 외부에서 로컬IP:PORT 로 접근 가능 (ex. https://192.168.8.21:9000)


☝ 위와 같이 했는데 외부접속이 안된다면..
-
wsl로 접속한 Ubuntu버전 확인하기
-
PowerShell 접속 후 ‘wsl —list’ 커맨드 입력
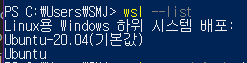
- hypercloud 프로젝트가 있는 Ubuntu버전으로 default 설정돼있는지 확인
- default가 다른 버전으로 돼있다면 ‘wsl —setdefault [제품버전명]’(예: ‘wsl —setdefault Ubuntu-20.04’) 로 default설정 바꾼 뒤 위에 1번부터 다시 진행해보기
-

etc
- TODO: 작업 스케줄러에 등록해두면 매번 명령을 실행하지 않아도 됨..
- https://github.com/microsoft/WSL/issues/4150